
After a windstorm, it’s hard to know what to tackle first. Between scattered debris, roof leaks, and the worry of more damage, the next steps can feel overwhelming.
With Jenkins Restoration and Remodel, you get clear guidance through wind damage restoration and cleanup, from safety checks and temporary protection to repairs and insurance documentation support.
In this guide, you’ll learn the essential steps to assess the damage, secure your property, clean up safely, and move forward with a plan you can trust.
Wind Damage Restoration And Cleanup Basics: What It Means For Your Home
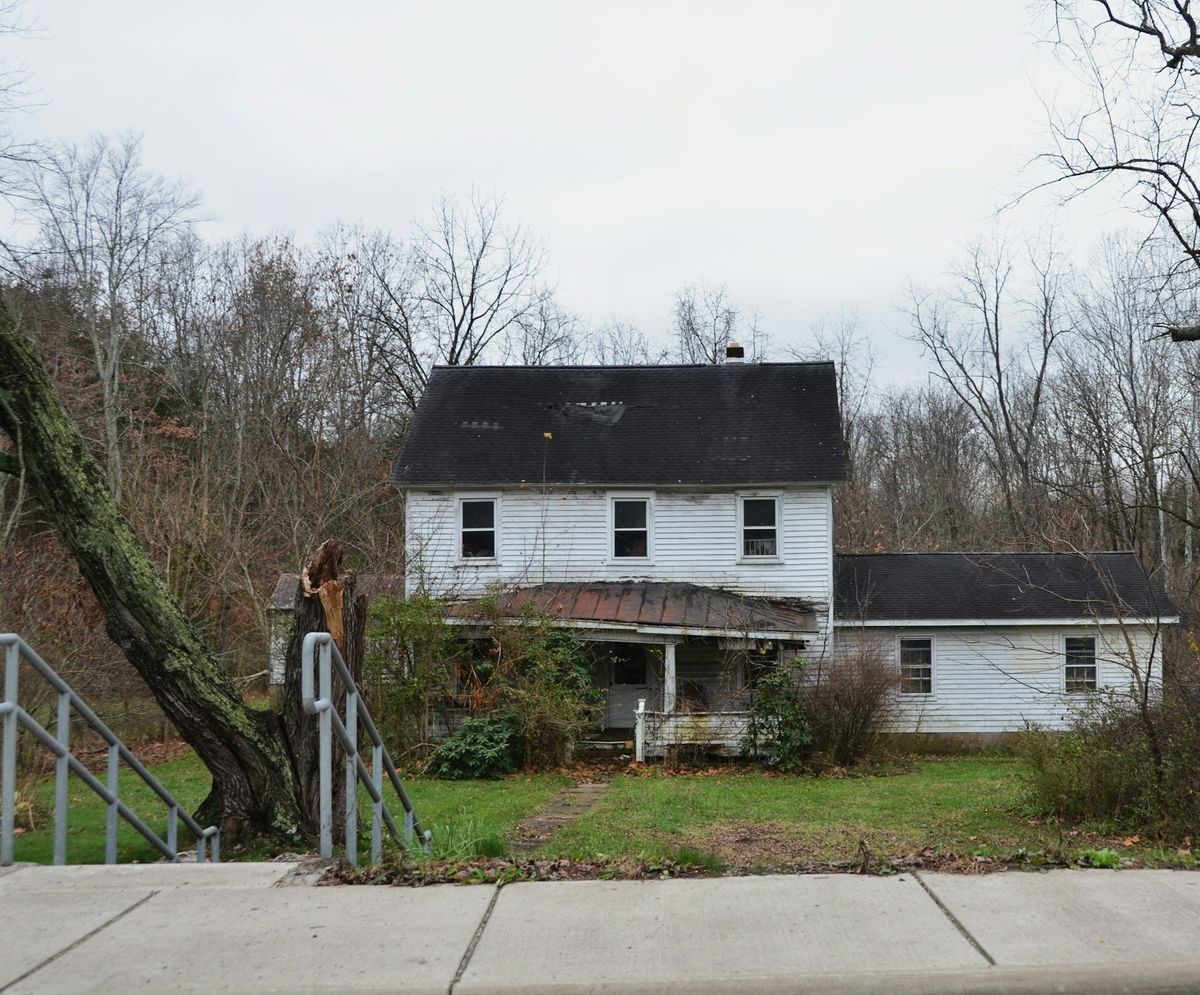
Wind damage restoration cleanup is all about repairing and restoring properties hit by high winds or nasty weather. This covers the obvious stuff, like broken windows and torn roofs, but also the hidden structural issues that could threaten your property’s safety.
What Qualifies As Wind Damage
Wind damage hits when storms, hurricanes, or even those freak wind gusts slam into your home or business. Usually, anything above 50 mph can start causing problems.
Insurance companies recognize wind damage if it comes from storms with sustained winds of 25 mph or more. But honestly, the exact number might change depending on your policy or where you live.
Common wind speed damage thresholds:
25–50 mph: Minor stuff, loose items, gutters, small branches
50–75 mph: Moderate, shingles, siding, fences
75+ mph: Severe, roofs, windows, and even the structure itself
If you can, document the wind speeds during the storm. Local weather reports or meteorological data can really help with insurance claims.
Common Types Of Wind-Related Property Damage
The roof’s usually the first to get battered. Missing or busted shingles, torn flashing, and even whole sections getting peeled up can leave your place wide open to water damage.
Windows and doors might shatter or crack from flying debris. Even a tiny crack lets moisture in, which can lead to mold and all sorts of interior headaches.
Siding can get torn off, dented, or ripped away, exposing your home to the elements. That’s never good.
Other common wind damage:
Mangled gutters and downspouts
Trees or big branches down in your yard
Smashed fences, decks, sheds, or other outdoor stuff
Bent garage doors
Damaged chimneys and vents
Debris scattered everywhere
Immediate Steps After Wind Damage
Your safety’s the top priority after a windstorm. Stay clear of downed power lines or unstable structures. Take photos and videos of everything before you start fixing anything. Snap pics from different angles, and get close-ups of the worst spots.
Call your insurance company within a day or two. Most policies want you to report damage right away. Cover broken windows or roof gaps with tarps to keep out rain. Hang on to receipts for any emergency fixes; you might get reimbursed for those.
Why Specialized Cleanup Is Essential
Wind damage restoration cleanup isn’t just a regular repair job. Professionals know how wind messes with different building materials and can spot hidden problems you might miss.
Restoration pros also know what insurance adjusters need to see. They’ll help you with the paperwork and make sure your claim doesn’t get stuck in limbo.
They use special gear, think industrial fans, moisture meters, thermal cameras, to find water or structural issues you’d never notice. This stops long-term headaches like mold or rot.
Restoration teams usually move faster than general contractors because storm cleanup is their thing. That speed can save you money and prevent more damage.
Assessment And Inspection Process
A solid assessment after wind damage helps catch both obvious and sneaky problems that could get worse over time. Inspectors start with safety hazards, then check the building’s stability, and finally hunt for hidden issues.
Performing A Safety Check
Safety first, always. Before you go inside, check for hazards like downed wires, gas leaks, or anything that looks like it might collapse.
Look out for:
Electrical hazards: Exposed wires, sparking outlets
Structural instability: Sagging roofs, leaning walls
Gas leaks: Smell of gas, hissing sounds
Water damage: Standing water near outlets or wires
Broken glass: Sharp stuff in your path
If you spot any of these, stay out and call in the pros. Don’t mess with electrical or gas issues yourself. Once it’s safe, start snapping photos and jotting down notes for your insurance claim.
Evaluating Structural Integrity
Wind can mess with your home’s bones. Inspectors check the roof, walls, foundation, and support beams for compromised areas.
The roof usually takes the brunt. Inspectors look for missing shingles, holes, and weak spots in the trusses. They’ll also check if water got through and damaged the inside.
Walls and siding need a close look too. Wind can crack walls, break siding, or mess up the connection between walls and roof. That lets water in and weakens the whole structure.
Serious storms sometimes crack or shift foundations. Inspectors look for new cracks, separations, or signs your house moved.
Identifying Hidden Damage
Not all wind damage is obvious. Water sneaks into walls, attics, and crawl spaces through tiny openings.
Inspectors use moisture meters and thermal cameras to find hidden wet spots. These tools pick up damp insulation, wet framing, and trapped moisture. Catching this early prevents mold and rot.
Attics often hide big problems. Wind can lift shingles just enough to let water in. Inspectors look for stains, damaged insulation, and messed-up roof decking. Don’t forget to check your HVAC and ductwork. Strong winds can knock ducts loose or shove debris into your ventilation.
Securing Your Property
After wind damage, your first move is to protect your place from more harm. Quick action on temporary repairs, entry point protection, and cleaning up debris keeps things from getting worse.
Temporary Roof Protection
If you’ve got missing or damaged shingles, your roof’s wide open to rain and trouble. Cover exposed spots right away with tarps or heavy plastic. Secure it with boards and nails, and make sure it stretches at least four feet past the damage.
How to cover a damaged roof:
Measure the bad area before buying supplies
Use tough, outdoor-grade tarps
Anchor the tarp with 2x4s on all sides
Don’t walk on a wet or damaged roof
If the roof’s really bad or super steep, hire a pro for emergency board-up. It’s risky to climb up there yourself. Many companies offer 24/7 emergency response for this kind of thing.
Boarding Up Windows And Entry Points
Busted windows and doors let in weather, critters, and even thieves. Board them up with 3/4-inch exterior plywood cut to fit each spot.
Screw or bolt the boards right to the window frame for a solid seal. Seal any gaps with weatherproof tape to keep moisture out. Don’t overlook garage doors, vents, or holes in the siding. Even little gaps can let in a lot of water.
Debris Removal From Exterior Areas
Wind scatters branches, roofing, and all sorts of junk everywhere. Clean up debris quickly to avoid injuries and make space for repair crews. Start with anything blocking paths or driveways.
Sort debris into piles: yard waste, building materials, and stuff you can save. Sharp items like glass or metal should go in sturdy bins. Big trees or limbs near power lines? Call a professional, don’t risk it.
Check gutters and downspouts for clogs. Blocked drainage can cause water to pool and create new problems next time it rains.
Wind Damage Cleanup Techniques
After a windstorm, a good cleanup keeps your home safe and prevents even more damage. The right steps for debris removal, clearing damaged spots, and dealing with water make recovery way less stressful.
Removing Fallen Trees And Limbs
Before you touch any fallen trees or branches, check for hazards. Look for power lines, dangling limbs, or anything tangled with wires.
You can handle small branches with basic tools, such as pruning shears and a saw. Stack the debris away from your house until you can haul it off. Wear gloves, safety glasses, and boots; no one wants a splinter or worse.
Big trees or heavy limbs? Let the pros handle it. Tree removal companies have the gear and know-how to do it safely. Never try to cut a tree leaning on your house or tangled with power lines. Take photos of everything before you start cleaning up. Insurance will want proof.
Clearing Roof And Gutter Debris
Check your roof from the ground first; binoculars help. Look for missing shingles, damaged flashing, or piles of debris.
Clean out gutters and downspouts as soon as you can. Clogged gutters mean water backing up under your roof, leading to leaks inside. Use a sturdy ladder with someone holding it, and scoop out the gunk by hand or with a gutter tool.
Safety reminders:
Don’t walk on wet or damaged roofs
Stay off if you spot missing shingles or soft spots
For steep roofs or big damage, call a pro
If you can safely reach from a ladder, cover damaged areas with a tarp. It’s not perfect, but it’ll keep rain out until you can get repairs done.
Cleaning Up Interior Water Damage
Act fast if water got inside. Mold can show up in just a day or two. Soak up standing water with towels, mops, or a wet vac. Move furniture and stuff away from wet spots. Pull up wet carpet padding; it almost never dries right and just breeds mold.
How to dry things out:
Open windows and doors for fresh air
Point fans at wet walls and floors
Run dehumidifiers to pull moisture out
Remove wet insulation from walls if you can
If you have a moisture meter, check inside walls and ceilings. Water travels in weird ways. Pros have special drying gear for major flooding or big leaks.
Toss anything porous that stayed wet more than two days, drywall, insulation, cardboard, you name it. They’ll hold moisture and grow mold, even if they look okay.
Restoration And Repair Solutions
Wind damage can mess up everything from your roof to your floors. Professional restoration teams tackle each problem area with the right fix to get your place back to normal.
Roof Restoration Services
Roofs take the worst of wind storms. Gusts can tear off shingles, rip underlayment, and even damage the decking underneath.
Restoration crews check the whole roof system. They look for missing shingles, lifted edges, and busted flashing. Any weak spots need fixing right away to keep water out.
Repairs usually include:
Swapping out torn or missing shingles
Replacing underlayment
Fixing flashing and seals
Repairing or swapping out damaged decking
Making sure ventilation works
Emergency tarping keeps your home dry while you wait for permanent repairs. It’s a lifesaver when you’re stuck waiting for a full fix.
Siding And Exterior Repairs
Wind-driven debris can crack, dent, or rip off chunks of siding. That leaves your walls open to moisture and pests.
Restoration pros pull off damaged siding and check the structure behind it. They’ll look for water damage in the sheathing and insulation. Any wet or moldy stuff gets replaced before new siding goes up.
They’ll match new siding to your existing colors and materials. Proper installation with the right overlaps and fasteners keeps your place protected and looking sharp.
Flooring And Interior Reconstruction
Water sneaks inside during wind storms, usually through damaged roofs or broken windows. This moisture can ruin carpets, hardwood floors, and even the subfloors underneath.
Technicians use moisture meters to track down every affected spot. They’ll pull up wet carpeting and padding right away to stop mold before it starts.
Hardwood floors might need drying equipment, or sometimes you just have to replace them if they’ve been soaked too long. There’s no quick fix when wood warps.
If walls soak up too much water, drywall removal becomes necessary. Restoration crews cut out damaged sections, dry the wall cavities, and put up new drywall.
They’ll paint to match your existing walls and get your rooms looking like they did before the storm, well, hopefully close enough.
Dealing With Insurance Claims
Getting your insurance claim approved really comes down to clear documentation and steady communication. These two things can make the difference between a smooth claim and months of headaches.
Documenting Damages For Claims
Take photos and videos of every damaged area before you move or fix anything. Get wide shots for the big picture and close-ups for the details, think broken shingles, cracked siding, water stains, the works.
Make a thorough list of all damaged items and structures. Write down when you found each issue, and include measurements if you can. Hang on to any broken pieces or debris that show wind damage patterns. It’s hard to argue with physical evidence.
Save all receipts for emergency repairs or temporary fixes. Your insurance company wants proof of what you spent to keep things from getting worse. Store digital copies of everything in the cloud or email them to yourself for backup. You never know when you’ll need them again.
Build a timeline that shows when the wind damage happened and when you reported it. Throw in weather reports from that day to support your claim. The more you provide upfront, the faster your adjuster can move things along.
Communicating With Your Insurance Provider
Call your insurance company within 24 to 48 hours of finding wind damage. Ask for your claim number and jot down your adjuster’s name and contact info.
Follow up regularly, but don’t overdo it. A weekly check-in is usually enough for most claims. Keep notes on every conversation, date, time, and what you talked about.
Ask questions if policy terms or coverage limits don’t make sense. If you get denied or offered less than expected, ask for a written explanation.
Respond quickly to any requests from your insurance company. Missing documents or delays can slow your claim to a crawl. If you can’t provide something right away, let them know when you will. Honesty goes a long way here.
Choosing A Wind Damage Restoration Cleanup Company
Finding the right restoration company really impacts how fast your property bounces back and how long the repairs last. Look for companies with proper credentials and don’t be shy about asking questions before you sign anything.
Key Qualifications To Look For
Check that the company has the right licensing and insurance for restoration work in your state. Legitimate companies carry general liability insurance and workers’ comp coverage to protect you if something goes wrong during repairs.
Look for certifications from groups like the Institute of Inspection, Cleaning, and Restoration Certification (IICRC). These show that technicians have real training in restoration methods.
Experience counts for a lot. Companies with years of storm restoration under their belts know how to spot hidden damage and work smoothly with insurance adjusters.
Ask about emergency response time. The best companies offer 24/7 availability and can show up within hours to stop things from getting worse.
Check online reviews and ask for references from recent projects. Reach out to previous customers to get a feel for work quality, communication, and how the company treats people.
Questions To Ask Prospective Contractors
Ask how they handle insurance claims and whether they’ll work directly with your insurance company. Some companies have staff who specialize in helping clients navigate the claims process and document damage.
Request a detailed written estimate that breaks down labor, materials, and the timeline. Be wary of companies that only give vague verbal estimates or pressure you to sign right away.
Find out what equipment and methods they use for different repairs. A good company should explain its approach to structural repairs, water damage mitigation, and debris removal.
Ask if they guarantee their work and what the warranty covers. Reputable companies back up their repairs with written warranties that protect you if issues pop up later.
Preventing Future Wind Damage
Strengthening your property against wind damage means making structural improvements and thinking smart about your outdoor setup. These steps can save you a lot of money and stress the next time storms roll in.
Reinforcing Vulnerable Areas
Your roof is the first line of defense. Install hurricane straps or clips to connect your roof to the walls. These metal connectors can help keep your roof in place during high winds.
Check that all shingles are secure and replace any that are loose or damaged. It’s tedious, but it matters. Windows and doors need extra attention, too. Add storm shutters or impact-resistant windows to prevent breakage.
Seal gaps around window frames and door jambs with weatherstripping to keep wind and water out. Don’t forget the garage door. Reinforce it with a bracing kit or upgrade to a wind-rated door. A failed garage door lets wind pressure into your home and can blow the roof off from the inside.
Check your siding to make sure it’s properly fastened. Loose panels can tear off in strong winds and cause even more damage. Replace missing or damaged sections as soon as you spot them.
Landscape Management Tips
Trees near your home need regular trimming. Cut dead branches and remove weak or diseased trees before storm season hits. Keep trees pruned so there’s less for the wind to grab onto. Plant new trees at least 20 feet away from your house for a safety buffer.
Choose native species that handle local wind conditions better. It’s a small detail, but it helps. Secure or store outdoor items that could turn into projectiles. Move patio furniture, grills, and planters into the garage or shed when storms are coming.
Anchor bigger items like sheds or playsets if you can’t move them. Keep gutters and downspouts clear so water drains properly and doesn’t add extra weight to your roof.
Final Steps And Returning Home
After cleanup and repairs, you’ve got a few final steps before moving back in. The restoration team should give you clearance that the home is safe and structurally sound.
Before returning home, make sure:
All repairs meet building codes and safety standards.
Utilities work properly and safely.
Air quality is good, with no lingering moisture issues.
Debris is gone from your property.
You’ll want documentation of all the work done. Store these records with your insurance paperwork for future reference. Walk through your home with the contractor to inspect everything. This is your chance to ask questions and bring up any concerns before you sign off.
Test all systems: electrical outlets, plumbing, heating and cooling, appliances. Make sure windows and doors open and close like they should. Your insurance company might require a final inspection before closing your claim. Schedule it soon to avoid delays.
Take your time moving back in. Sometimes you notice issues after the dust settles. Keep copies of all restoration documents, receipts, and photos in a safe place. You’ll need them for taxes, future insurance claims, or if you ever sell your home.
Moving back after wind damage can feel overwhelming. Taking these steps helps ensure your home is truly ready and safe for your family, even if it takes a little longer than you hoped.
Moving Forward After Wind Damage
Wind damage can leave your home exposed and your plans on hold. Taking the right steps in the right order helps prevent further damage, reduces stress, and brings a sense of control back to the situation.
From securing your property to completing repairs, Jenkins Restoration and Remodel provides steady guidance and dependable craftsmanship throughout the wind damage restoration and cleanup process.
If your home was impacted by high winds, get in touch to schedule a consultation and start moving forward with confidence.
Frequently Asked QuestionsWhat Should I Do First After Wind Damage?
Start with safety. Avoid downed power lines, unstable structures, and standing water near electrical sources. Once it’s safe, document all visible damage with photos and videos before starting any cleanup or repairs.
How Soon Should Wind Damage Restoration Cleanup Begin?
Cleanup should begin as soon as possible. Delays can allow water intrusion, mold growth, or structural issues to worsen. Even temporary steps like tarping a roof or boarding windows can help prevent secondary damage.
Does Home Insurance Usually Cover Wind Damage?
Most homeowner’s insurance policies cover wind-related damage, but coverage depends on your specific policy and deductible. It’s important to report damage promptly and keep detailed documentation to support your claim.
What Is Included In Wind Damage Restoration Cleanup?
Wind damage restoration cleanup typically includes debris removal, temporary roof or window protection, water removal if needed, drying affected areas, and repairing damaged structures like roofing, siding, and interiors.
How Long Does Wind Damage Restoration Take?
The timeline depends on the severity of the damage. Minor cleanup and repairs may take a few days, while larger restoration projects involving roofs or structural repairs can take several weeks or longer.
Can Wind Damage Cause Problems I Can’t See Right Away?
Yes. Wind can create small openings that allow water to enter walls, attics, and crawl spaces. These hidden issues may lead to mold, rot, or insulation damage if not addressed during wind damage restoration cleanup.
Is It Safe To Handle Wind Damage Cleanup Myself?
Light debris cleanup may be safe, but roof damage, fallen trees, and structural issues should be handled by professionals. These situations pose serious safety risks and often require specialized equipment.
How Can I Reduce Wind Damage In The Future?
Regular roof inspections, securing loose siding, trimming nearby trees, reinforcing garage doors, and securing outdoor items can all help reduce the risk of wind damage during future storms.