
Emergency Water Damage Cleanup: What to Do in the First 24 Hours
Jenkins Restoration and Remodel
You hear it before you see it. Water rushing where it should not be. A soaked carpet, a collapsed ceiling, a basement filling fast. In the first few seconds after discovering a flood or water intrusion, most homeowners freeze. That panic is completely normal, and you are not alone in feeling it.
The actions you take in the next 24 hours matter more than almost anything that comes after. Moving quickly and in the right order can mean the difference between a manageable repair and months of structural damage or mold problems. Moving without a plan, or in the wrong sequence, can make things worse or hurt your insurance claim before it even starts.
Keep reading to learn a clear, step-by-step sequence for the first 24 hours after water damage, including how to stay safe, protect your documentation, remove water, and start drying out the space. This guide is written for the homeowner who is in crisis mode right now and needs calm, honest answers, not complicated jargon.
Make Sure the Home Is Safe to Enter
Before you touch anything, the first question is whether the space is safe to walk into. Water and electricity are a dangerous combination, and that risk is not always obvious at first glance.
Watch for Electrical and Slip Hazards
Turn off the power to any flooded area at your breaker box before you step in. If your breaker box is in the flooded area, do not attempt to reach it. Call your utility company or wait for a professional. Standing water near outlets, appliances, or electrical panels creates a real risk of electrocution.
Wet floors are also extremely slippery, and waterlogged ceilings can sag and collapse without warning. Wear rubber-soled shoes at minimum. If you can smell gas, leave immediately and call your gas utility from outside.
Look for these signs before you enter:
Water near the electrical panel or outlets
Bulging or sagging ceilings
Visible structural cracks in walls or floors
A strong sewage or chemical smell
Standing water deeper than a few inches throughout multiple rooms
Know When to Stay Out and Call for Help
Some situations call for you to stay out entirely until a professional has assessed the space. Floodwater from outside your home, sewage backups, and roof collapses introduce contaminants and structural risks that go beyond what a homeowner can safely evaluate.
If the water source is unknown, or if the flooding came from outside rather than a burst pipe or appliance, treat it as contaminated water. That type of water can carry bacteria, mold spores, and chemicals. Protective gear, including gloves and waterproof boots, is the minimum requirement if you must enter.
Once you know the space is safe, your next priority is to stop whatever is still contributing to the water problem.
Stop the Water Source if You Can
Finding and stopping the source of water is the single most important action after confirming safety. Every minute the water runs, more material absorbs moisture and more damage accumulates.
Shut Off Plumbing Fixtures or the Main Valve
If a pipe bursts, a toilet overflows, or an appliance such as a washing machine or dishwasher leaks, shut off the supply valve closest to the source. For a sink or toilet, that is usually the small oval valve near the base of the fixture. Turn it clockwise until it stops.
If you cannot locate the source valve, or if the leak is behind a wall, shut off the main water valve for the house. Most homes in Southern Maryland have the main shutoff either in the basement, near the water heater, or outside near the foundation. Knowing its location before a crisis is worth the 30 seconds it takes to check right now.
After the water is off, do not assume the damage stops immediately. Saturated materials continue releasing moisture into surrounding areas for hours. That is why the documentation step comes next, not cleanup.
Reduce Further Damage From Rain or Roof Leaks
If the water is coming from a storm or roof leak, shutting off a valve will not help. Instead, focus on slowing the intrusion. Move furniture and valuables out of the path of dripping water. Place buckets or towels where water is actively entering. If you have plastic sheeting and can safely access the attic, covering exposed areas from the inside can help prevent further water entry.
Do not attempt to get on a wet roof to cover damage during or immediately after a storm. That is a job for a professional who can assess the structural condition before putting weight on it. For now, contain what you can from the inside and focus on what you can safely control.
Document the Damage Before Cleanup Moves Too Far
Take out your phone and start recording before you move a single item or wipe up a single drop. Documentation completed before cleanup begins is your strongest protection in the insurance claim process.
Take Photos and Video for Insurance
Walk through every affected room and take wide shots of the full space first, then close-up shots of specific damage. Capture the water line on walls, soaked flooring, damaged furniture, and any visible structural damage. Record a continuous video walkthrough narrating what you see, room by room. Time-stamped photos and video create a clear record that is much harder for an insurer to dispute.
Photograph the water source if you can identify it. A burst pipe, a failed water heater, a cracked foundation wall. That source documentation helps establish the cause of loss, which directly affects what your insurance covers.
Keep in mind that most homeowner policies require you to take reasonable steps to stop ongoing damage. Documenting that you shut off the water and began mitigation protects you in that regard.
Read more: Water Damage Insurance Claims Guidance for Faster Payouts
Make a Room-by-Room List of Damaged Items
After photos and video, walk through the same rooms with a notepad or a voice memo and list every damaged item. Include appliances, furniture, flooring materials, rugs, electronics, and any structural elements like drywall, baseboards, or cabinetry.
For appliances, record the make, model, and serial number where possible. Preserve damaged items until an insurance adjuster has seen them. Do not throw anything away before the claim is reviewed, even if it seems clearly ruined. Adjusters need to see the evidence, and discarding items before the visit can complicate your payout. With your documentation in hand, you are now ready to start moving water and materials out.
Remove Standing Water and Wet Items Quickly
Getting water out of the space fast is critical. The longer it sits, the deeper it penetrates into subfloors, wall framing, and insulation, areas that become expensive to dry out and easy places for mold to start.
Move Out Rugs, Upholstery, and Soft Materials
Remove area rugs, throw pillows, upholstered furniture, bedding, and any soft goods as quickly as possible. These items absorb enormous amounts of water and accelerate the spread of moisture to surrounding floors and walls. Move them to a dry outdoor space or a garage where air can circulate.
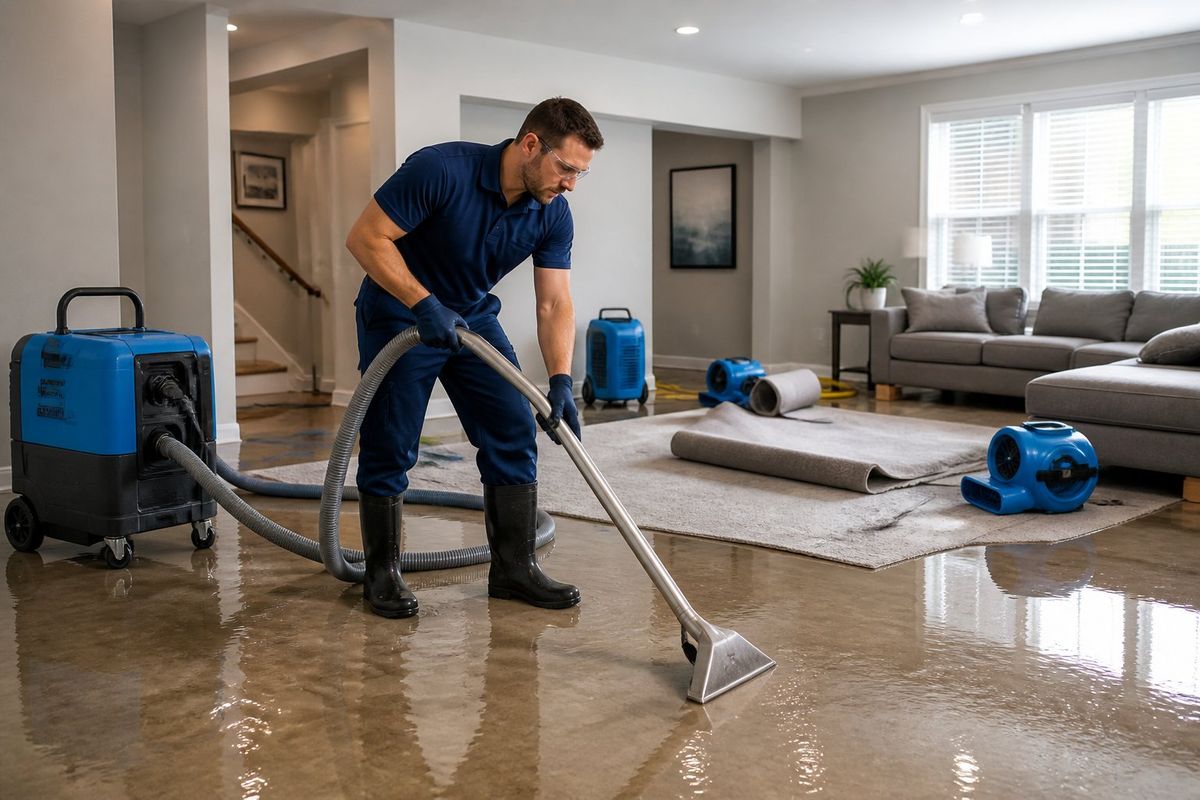
For standing water, a wet/dry shop vacuum is effective for moderate amounts. Mops and towels work for smaller puddles. If the flooding is significant, meaning several inches across a large area, that volume of water typically requires professional extraction equipment to remove thoroughly. Trying to mop out a heavily flooded room leaves behind hidden moisture in the subfloor and framing that fans alone will not dry.
Separate Salvageable Items From Unsalvageable Debris
Not everything that gets wet is a total loss, but some items are not worth attempting to save. As you clear the space, sort materials into two groups:
Salvageable: hard furniture that can dry and be cleaned, solid wood items without swelling, electronics that were not submerged, clothing and linens that can be machine washed
Unsalvageable: particleboard furniture that has swelled, mattresses soaked through, carpeting that sat in contaminated water, insulation that absorbed floodwater, drywall saturated beyond an inch or two from the base
Keeping these categories separate helps when you document damaged property for your insurance claim. It also makes the restoration process cleaner when a professional team arrives to assess the structure. With the space cleared, your attention should shift immediately to airflow.
Start Drying the Space to Slow Mold Growth
Mold can begin developing in wet materials within 24 to 48 hours. The goal right now is not to fully dry the space, but to remove as much moisture as possible from the air and surfaces while you wait for a professional assessment and repair.
Use Fans, Airflow, and Dehumidifiers Safely
Open windows and doors if outdoor humidity is lower than indoor humidity. Position box fans or portable fans to push air across wet surfaces and toward exits. If you have a portable dehumidifier, run it continuously in the affected area and empty the reservoir frequently.
Do not run fans if you suspect mold is already present, as circulating air spreads spores. And avoid using heating to speed drying in ways that further raise indoor humidity. If the outdoor air is muggy, as it often is in Southern Maryland summers, keep windows closed and rely on a dehumidifier instead of outside airflow.
Pay Attention to Walls, Baseboards, and Cabinets
The damage you can see on the surface is rarely the full picture. Water wicks upward into drywall, inward behind baseboards, and underneath cabinet toe kicks. Press gently on baseboards to check for softness. Look for discoloration that extends above the visible waterline on the drywall.
Kitchen and bathroom cabinets that sat in standing water may have absorbed moisture into the base panels. Even if they look fine on the outside, swelling and mold can develop inside. These areas require professional moisture readings to assess accurately. A surface that looks dry to the touch can still hold enough moisture inside the wall cavity to feed mold growth for weeks.
What Happens After the Immediate Crisis
The first 24 hours are about stabilizing your home and protecting your claim. What comes after is where the actual restoration begins, and knowing the sequence helps you plan rather than react.
When Repairs and Rebuilding Usually Begin
Restoration work does not start until the space has been properly dried and assessed. Professionals use moisture meters to confirm that wall cavities, subfloors, and framing have reached acceptable dryness levels before any rebuilding happens.
That drying phase typically takes several days with commercial drying equipment, though the timeline varies based on how saturated the materials are and how much ventilation is available.
Skipping this phase and rebuilding over damp materials can lead to mold growth inside the new walls. That is a significantly more expensive problem to fix than the original water damage. Patience during the drying phase protects every dollar spent on repairs.
Scheduling a Restoration Consultation in Southern Maryland
Once the immediate crisis steps are complete and the space is stabilizing, the next move is to schedule a professional assessment. A trained restoration team can evaluate what structural repairs are needed, identify hidden moisture the naked eye cannot see, and help you navigate the insurance claim so repairs move forward without delays.
Frequently Asked Questions
What Should I Do First to Protect My Family and Home After a Pipe Bursts or an Appliance Overflows?
Your first step is confirming the space is safe to enter by checking for electrical hazards and structural risks. Then shut off the water at the nearest supply valve or the main house shutoff to prevent further damage.
How Quickly Does Standing Water Turn Into Mold, and What Signs Should I Watch for in the First 48 Hours?
Mold can begin developing in wet materials within 24 to 48 hours of water exposure. Watch for musty odors, soft or discolored drywall, and any visible spotting on walls, baseboards, or cabinets as early warning signs.
What Does a Trusted Cleanup Crew Do on Day One to Dry Walls, Floors, and Framing Without Tearing Out More Than Necessary?
Professionals use moisture meters to measure how deep water has penetrated into walls, subfloors, and framing before deciding what needs to be removed. Commercial air movers and dehumidifiers are strategically placed to dry cavities from the inside, reducing the amount of material that needs to be removed.
What Affects the Total Cost of Water Cleanup and Repairs, and What Should I Ask for in a Clear, Tailored Estimate?
Cost depends on the size of the affected area, the type of water involved, how long the water sat before cleanup began, and what structural materials were saturated. Ask for an itemized estimate that separates mitigation, drying, and repair costs so you understand each phase and can compare it against your insurance settlement.
Will My Homeowners Insurance Cover the Cleanup and Rebuild, and What Photos or Documentation Should I Gather Right Away?
Many homeowners policies cover sudden and accidental water damage, including the cost of mitigation, such as water extraction and drying, to prevent further loss. Take wide and close-up time-stamped photos of every affected room, document the source of the water, and keep all damaged items on-site until your adjuster has completed their visit.
How Do I Choose a Locally Owned Restoration Company in Southern Maryland, Prince George's County, or Anne Arundel County When Time Is Tight?
Look for a company with documented local experience, a track record of working directly with insurance companies, and clear communication from the first call. A locally owned contractor with deep roots in the Southern Maryland area will understand regional building materials and common storm-related damage patterns specific to this climate.
You Have Done the Hard Part, Now Get the Right Help
Getting through the first 24 hours of a water emergency is genuinely difficult. You stayed calm, protected your family, documented the damage, and started the drying process. That work matters and sets up everything that comes next.
The repair and restoration phase requires professional expertise, accurate moisture readings, and coordination with your insurance company. Trying to skip the assessment step or begin rebuilding too soon is the most common and costly mistake homeowners make after a flood. A clear, tailored plan from a qualified contractor protects both your home and your claim.
Jenkins Restoration and Remodel has served Southern Maryland homeowners for more than 50 years, handling water damage restoration and insurance claim navigation as part of a single, managed process. Schedule a free consultation and get a clear plan before any work begins. Call us today at (301) 884-6180.